Rust Traits: Defining Character
From basic syntax to building plugins with once_cell and organizing your Rust projects.
This is Episode 03
TL;DR
- Rust splits projects into a binary crate (
main.rs) and a library crate (lib.rs) - Use hub files (
pub mod ...;) to keep a clean, explicit module tree - In
main.rs,crate::refers to the binary crate → use the crate name fromCargo.tomlto access library modules make_sensor()works as a factory, returningBox<dyn TempSensor>Vec<Box<dyn Trait>>allows storing different sensor types and calling methods via dynamic dispatchs.get_temp()works through auto-deref + borrow, turning theBoxinto&dyn TempSensorand dispatching through the vtable- The result: a modular, extensible architecture, ready to scale with more sensors and actuators

Posts
Table of Contents
Modules and Crates
Where we organize the project around crates and a new directory hierarchy
Running the demo code
- Right click on
assets/09_modules_crates - Select the option “Open in Integrated Terminal”
cargo runcargo run --example ex00
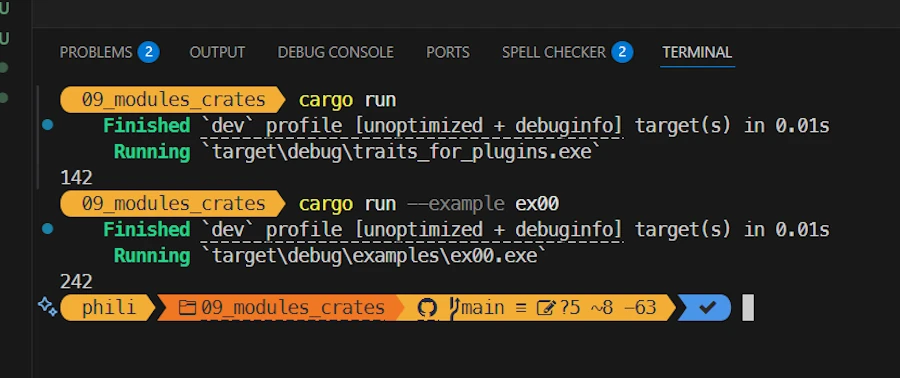
Comment about the picture above
Explanations 1/2
Hey guys. I just got out of the MMB (Monday Morning Briefing) with the sales and marketing teams… Yes, I know… But, anyway, good news… It looks like there are opportunities if our monitoring system can work with other types of sensors (strain gauge, flow meter, ph meter…) as well as actuators. I was asked to produce a POC (proof of concept) by the end of the week. I said no, no way. But I had to give them something. So we agreed to run a demo version of the application with 2 kinds of temperature sensors but dealing with each of them as if they were different kind of sensors. Before to discuss budget they want to be sure the application can scale.
In other words it is time to reorganize the project and the project’s directory.
Note: I will not spend to much time on the subject. Indeed I already have a dedicated short post that you can read here.
Good to know
- The project had a unique
main.rsfile. From now on it will havemain.rsandlib.rsmain.rsis a consumer of API exposed bylib.rs
- Because the project has both
lib.rsandmain.rs,Cargoconsiders the project as a library crate plus a binary crate. - The build system (rustc and friends) first builds the library crate, then the binary crate (using the library’s content).
- The build system doesn’t care about files and directories — it only cares about the module tree it builds in memory
Methodology
- Organize the directories however I like
- Name the files however I like
- Use hub files to connect everything into a clean module tree
- One directory → one hub file in its parent directory
- Hub file name = directory name +
.rs - Hub file content =
pub mod ...;for every child module (files AND subdirectories) - Leaf files don’t need hub files
Show me the code!
.
│   Cargo.lock
│   Cargo.toml
│
├───examples
│       ex00.rs
│
├───src
│   │   lib.rs
│   │   main.rs
│   │   sensors.rs
│   │
│   └───sensors
│       │   temp.rs
│       │
│       └───temp
│           │   temp_sensor.rs
│           │   temp_sensor1.rs
│           │   temp_sensor2.rs
│           │
│           ├───temp_sensor1
│           │       my_sensor1.rs
│           │
│           └───temp_sensor2
│                   your_sensor2.rs
│
└───target
Explanations 2/2
1. Files and directories organization
You may not agree with me but here above is how I see the organization.
main.rsis a consumer of the “features/capabilities” exposed bylib.rsex00.rsis another consumer oflib.rs(think about some tests for example)- The
sensorsdirectory contains… The sensors. - Later an
actuatorsdirectory will contains… Tadaa! You’re right, the different kinds of actuators - So far we only have temperature sensors so there is a wrongly named
tempsubdirectory. It is badly named because it can be confused with atemporarydirectory. Ideally it should be namedtemperature. It is important to detect and fix upfront this class of issues. - For the POC 2 kinds of temperature sensors are needed. Their respective implementation files are stored in 2 specific directories (
temp_sensor1/andtemp_sensor2/). - Each directory contains the files needed to define each sensor.
2. Naming the files
Naming things is an Art and we could debate all day long about the filenames I use (see Wadler’s law). This is not the point. My point is : name the files the way you want and learn about the build system so that it works with your file hierarchy and naming convention.
In case of doubt, create a side project. Break everything, then come back to your main project.
All of this seems like good advice, but you haven’t provided much information about some of the new files I see in the tree above. Could we go through the list of files, read the code, and understand how the “module tree” is built?
3. Files and hub files
Let’s start at the top of the directory. Find below the content of Cargo.toml
[package]
name = "traits_for_plugins"
version = "0.1.0"
edition = "2024"


[dependencies]
I just want to underline that the name is traits_for_plugins. Next, we already said that since the directory have a lib.rs and a main.rs in the root, the compiler will build the lib crate then the binary crate. They will be respectively named target/debug/libtraits_for_plugins.rlib (.rlib like Rust lib, a static library plus some metadata. Cannot be linked with C/C++) and target/debug/traits_for_plugins.exe.
To build the library crate, the build system reads the content of lib.rs (the crate root file). Here it is in all its glory :
// lib.rs
pub mod sensors;
One line and that’s all. We declare a top level module named sensors and the build systems looks for the sensors module code in src/sensors.rs. Here it is :
// sensors.rs
// hub file for `./sensors/` folder
pub mod temp;
We declare a module /sensors/temp and the build system looks for the /sensors/temp module code in src/sensors/temp.rs. Here it is :
// temps.rs
pub mod temp_sensor; // The trait lives here
pub mod temp_sensor1; // Concrete sensor #1 (folder-backed)
pub mod temp_sensor2; // Concrete sensor #2 (folder-backed)
We declare 3 modules, respectively : src/sensors/temp/temp_sensor, src/sensors/temp/temp_sensor1 and src/sensors/temp/temp_sensor2. The build system
- looks for the
/sensors/temp/temp_sensormodule code insrc/sensors/temp/temps_sensor.rs - looks for the
/sensors/temp/temp_sensor1module code insrc/sensors/temp/temps_sensor2.rs - looks for the
/sensors/temp/temp_sensor2module code insrc/sensors/temp/temps_sensor2.rs
temp_sensor.rs contains the definition of the trait :
// temp_sensor.rs
pub trait TempSensor {
    fn get_temp(self) -> f64;
}
Contents of temps_sensor1.rs and temp_sensor2.rs are similar
// temp_sensor1.rs
// hub file for `./temp_sensor1/` folder
pub mod my_sensor1;
We declare a module /sensors/temp/temp_sensor1/my_sensor1 and the build system looks for the /sensors/temp/temps_sensor1/my_sensor1 module code in src/sensors/temp/temp_sensor1/my_sensor1.rs. Here it is :
// my_sensor1.rs
use crate::sensors::temp::temp_sensor::TempSensor;
pub struct TempSensor01;

impl TempSensor for TempSensor01 {
    fn get_temp(self) -> f64 {
        142.0
    }
}
It is important to understand the meaning of the 2 first lines in the source code above :
- The first line is nothing more than a shortcut.
- Rather than writing
crate::sensors::temp::temp_sensor::TempSensorwe can writeTempSensor - IMPORTANT : when the build system builds the library crate, the
lib.rsfile is the crate root file.my_sensor1is part of the module tree and so, when we need to create a shortcut to point toTempSensorwe must usecrate::sensors.... Keep this in mind when we will talk aboutmain.rs.
- Rather than writing
- The second line make sure that the data type
TempSensor01is visible from outside the module where it is defined.- This allow us to declare a variable of type
TempSensor01in themain()function for example.
- This allow us to declare a variable of type
Here is the module tree
crate (lib.rs)
└── sensors (sensors.rs)
    └── temp (temp.rs)
        ├── temp_sensor       (temp_sensor.rs, trait definition)
        ├── temp_sensor1      (temp_sensor1.rs → loads folder temp_sensor1/)
        │   └── my_sensor1    (my_sensor1.rs, implements TempSensor01)
        └── temp_sensor2      (temp_sensor2.rs → loads folder temp_sensor2/)
            └── your_sensor2  (your_sensor2.rs, implements TempSensor02)
Once the library crate is built then the build system builds the binary crate and it starts by reading main.rs. See below :
use traits_for_plugins::sensors::temp::temp_sensor1::my_sensor1;
use traits_for_plugins::sensors::temp::temp_sensor::TempSensor;

fn main() {
    let my_sensor = my_sensor1::TempSensor01;
    let my_temp = my_sensor.get_temp();
    println!("{my_temp}");
}
Again it is important to understand the first 2 lines
- Since we create a variable
my_sensorof typeTempSensor1we create a shortcut in the module tree so that we can writemy_sensor1::TempSensor01rather thantraits_for_plugins::sensors::temp::temp_sensor1::my_sensor1::TempSensor01- IMPORTANT : when the build system builds the binary crate (the application) the code in
main.rsdoes not see the internal modules viacrate::...directly. Indeed,crate::inmain.rsrefers to the binary crate itself, not to the library crate defined inlib.rs. So we have to build the path as if it were an external crate, using the crate name (the name defined in [package] name = “…” inCargo.toml). Hence theuse traits_for_plugins::...
- IMPORTANT : when the build system builds the binary crate (the application) the code in
- The second line is required because items from traits can only be used if the trait is in scope. Don’t trust me, comment the line and try to build the project.
Once this is understood the body of main() should be a piece of cake for you now.
I could modify the first shortcut to be able to write let my_sensor = TempSensor01; but, six months from now, when the source code will be much larger, I’ll be happy to read let my_sensor = my_sensor1::TempSensor01; and know that TempSensor01 data type belong to my_sensor1 module.
Exercise
- Make sur the code run as it is.
- Once this is checked, rename and reorganize files and directories the way you want. Make sure it no longer build. Fix everything and make it run again.
- In
main.rscomment the lineuse traits_for_plugins::sensors::temp::temp_sensor::TempSensor;, build the project and read the help messages from the build system.
Summary
- A Rust project can contain both a library crate (
lib.rs) and a binary crate (main.rs), with the binary consuming the API exposed by the library. - The compiler builds a module tree in memory, independent of file and directory names; hub files (
pub mod ...;) are used to connect directories and submodules. - Organizing code into modules and submodules (e.g., sensors, temperature sensors) keeps the project scalable and maintainable.
- In
lib.rs, paths we usecrate::...because it is the crate root, while inmain.rspaths must start from the crate name defined inCargo.toml. - Traits must be explicitly brought into scope (
use ...::TempSensor;) before their methods can be called, ensuring clarity and safety.
Dynamic Sensor Creation
Where we dynamically create and use sensors in the new architecture.
Running the demo code
- Right click on
assets/10_make_sensors - Select the option “Open in Integrated Terminal”
cargo runcargo run --example ex00
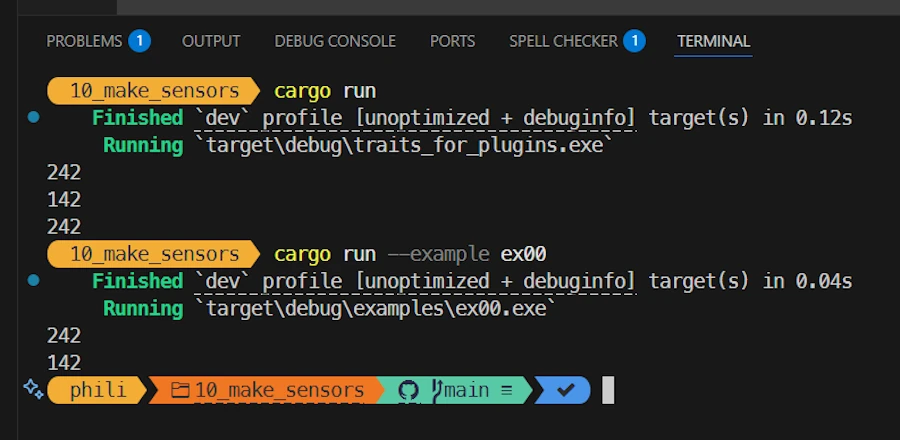
Comment about the picture above
Explanations 1/2
Morning! The POC went pretty well. Even the marketing guys understood the demo and the explanations. They are all confident about the scalability of the app. I got two feedbacks however:
- The first one is known and easy to fix :
temp[_whatever]is a wrong name. I told them that this was known and that we had planned to use “temperature” instead in order to be very explicit. - They understood I was focusing on the organization of the sensors directories and files. They were not surprised when I explained how the
main()function was working in this demo. However they want me to come back to the next meeting with a new version where the sensors are created dynamically. To tell the truth, I believe they are right.
Show me the code!
Now the hierarchy of directories and files looks like this :
.
│   .gitignore
│   Cargo.lock
│   Cargo.toml
│
├───examples
│       ex00.rs
│
├───src
│   │   lib.rs
│   │   main.rs
│   │   sensors.rs
│   │
│   └───sensors
│       │   temperature.rs
│       │
│       └───temperature
│           │   temperature_sensor.rs
│           │   temperature_sensor1.rs
│           │   temperature_sensor2.rs
│           │
│           ├───temperature_sensor1
│           │       my_sensor1.rs
│           │
│           └───temperature_sensor2
│                   your_sensor2.rs
│
└───target
Explanations 2/2
Files and Directories
I already changed temp to temperature. Obviously I updated the use statements. For example, in main.rs, now I have:
use traits_for_plugins::sensors::temperature::temperature_sensor::{self, TempSensor};
While we used to have :
use traits_for_plugins::sensors::temp::temp_sensor::TempSensor;
use traits_for_plugins::sensors::temp::temp_sensor1::my_sensor1;
Note that from now on, I combine the two lines in one using ::{self, TempSensor}
Changes in source code
If you agree (but don’t take it bad, I’m the writer of this post so you have no choice, you have to agree…) I will focus on what makes the dynamic sensors creation possible. In fact, the file and directory hierarchy is very similar to that of the previous project and does not require any special comments.
Take few minutes to read the main() function we wrote in Episode 0 in the section “Dynamic Dispatch”. The code was similar to :
fn main() {
    let mut sensors: Vec<Box<dyn Measurable>> = Vec::new();
    sensors.push(make_sensor("celsius"));
    sensors.push(make_sensor("fahrenheit"));

    for s in &sensors {
        println!("Reading: {}", s.get_temp());
    }
}

fn make_sensor(kind: &str) -> Box<dyn Measurable> {
    match kind {
        "celsius" => Box::new(TempSensor01 { temp: 1.0 }),
        "fahrenheit" => Box::new(TempSensor02 {
            label: "thermocouple".into(),
            temp: 25.0, // 77 °F
        }),
        _ => Box::new(TempSensor01 { temp: 0.0 }),
    }
}
In this version of the project we do exactly the same thing and the main() function looks like:
use traits_for_plugins::sensors::temperature::temperature_sensor::{self, TempSensor};

fn main() {
    let mut sensors: Vec<Box<dyn TempSensor>> = Vec::new();
    sensors.push(temperature_sensor::make_sensor(2));
    sensors.push(temperature_sensor::make_sensor(1));
    sensors.push(temperature_sensor::make_sensor(2));

    for s in sensors {
        println!("{}", s.get_temp());
    }
}
The difference is that the make_sensor() has been moved to the temperature_sensor module. Please note the use statement (shortcut) at the top of the source code. In the body of the main() function I can write temperature_sensor::make_sensor(2). We already mention it but it is important. In six months, I think this will make the source code easier to read, and we’ll be happy to understand right away that make_sensor() is defined in the temperature_sensor module.
Here is the content of temperature_sensor.rs:
use crate::sensors::temperature::temperature_sensor1::my_sensor1;
use crate::sensors::temperature::temperature_sensor2::your_sensor2;

pub trait TempSensor {
    fn get_temp(&self) -> f64;
}

pub fn make_sensor(kind: usize) -> Box<dyn TempSensor> {
    match kind {
        1 => Box::new(my_sensor1::TempSensor01),
        2 => Box::new(your_sensor2::TempSensor02),
        other => {
            // in production return a Result
            eprintln!("Unknown SENSOR_KIND='{other}', falling back to temp1.");
            Box::new(my_sensor1::TempSensor01)
        }
    }
}
The latest version of make_sensor() is almost a copy/paste of the previous one. Let’s review it again. Just to make sure we are on the same page:
make_sensor()is a factory function- It returns a
Box<dyn TempSensor>Box<T>is a owning smart pointer to a value of typeTstored on the heap.- It is a smart pointer because when the
Boxis dropped, it deallocates the heap memory for us. dyn TempSensoris a trait object.- This can be understood as : “some type that implements TempSensor, but we don’t know which one at compile time”
- A
dyn Traitvalue is unsized. We can’t put it directly on the stack by value. We need a pointer (level of indirection) like&dyn Trait,Box<dyn Trait>…
- Based on the
kindparameter and with the help of the arms of thematchexpression make_sensor()either constructs a concreteTempSensor1orTempSensor2data type and boxes it- The caller owns the sensor via the
Box, and it can callmy_sensor.get_temp(). The dynamic dispatch picks the right method at runtime.
That’s all for the modifications. What has been done is a mix between the previous version (the one with the source code reorganized within subdirectories) and the code from the Dynamic Dispatch section of Episode 0. A quick win…

Optional - Because the evil is in the details
How does the s.get_temp() call works? I’m talking about the one in the for loop that iterates over the collection of sensors in main()?
This is a 1 million dollars question.

Before answering this question it would be wise to read “The evil is in the details” section in Episode 0.
Ok, first let’s read again the main() function:
fn main() {
    let mut sensors: Vec<Box<dyn TempSensor>> = Vec::new();
    sensors.push(temperature_sensor::make_sensor(2));
    sensors.push(temperature_sensor::make_sensor(1));
    sensors.push(temperature_sensor::make_sensor(2));

    for s in sensors {
        println!("{}", s.get_temp());
    }
}
sensorsis a vector ofBox<dyn TempSensor>. That means a vector of heap-allocated concrete sensor (TempSensor01orTempSensor02), accessed through a trait object (TempSensor) handle (fat pointer = data ptr + vtable ptr).s.get_temp()desugars toTempSensor::get_temp(&*s)and here’s what happens to produce that&*s:- Auto-deref:
*sdereferences theBoxto get the innerdyn TempSensor. - Borrow to match the receiver: the method’s receiver is
&self, so Rust borrows that inner object:&(*my_sensor)→&dyn TempSensor
- Auto-deref:
- As in the first “The evil is in the details” of Episode 0 it is important to understand why
&selfmatters in the trait signature (fn get_temp(&self) -> f64) - All we know on how the actual
.get_temp()method is chosen still apply here. Read again the Dynamic Dispatch section from Episode 0.
Summary of the summary: s.get_temp() works with fn get_temp(&self) because the dot call autodereferences the Box and borrows it, producing an &dyn TempSensor. The vtable then dynamically dispatches to the correct concrete .get_temp() implementation, without transferring ownership of the Box.
Exercise
- Modify the
temperature_sensor::make_sensor()function so that it takes “Celsius” or “Fahrenheit” as parameters rather than the values 1 or 2.
Summary
- The project is reorganized (
temprenamed totemperature) while keeping the same modular structure. - Sensor creation is moved into a factory function
make_sensor()inside thetemperature_sensormodule. make_sensor()returns aBox<dyn TempSensor>, enabling dynamic dispatch over multiple sensor types.- The
main()function builds a vector of sensors dynamically and iterates over them, callingget_temp()at runtime. - Dynamic dispatch works through trait objects:
Box<dyn TempSensor>dereferences and borrows automatically, with the vtable selecting the right method implementation.