From Zero to Ready to Contribute: Illustrated with Microsoft Edit
A beginner-friendly guide from our first fork to our first pull request.
TL;DR
- A step-by-step guide to go from zero to your first open-source contribution using Microsoft Edit as a practical example.
- You install Rust (stable + nightly), clone your own fork, build the project, explore the codebase, debug, and understand the overall structure.
- You learn the daily workflow: keeping your fork in sync, creating clean branches, making changes, and preparing a proper PR.
- The exercises take you from simply reading code to submitting an actual contribution.
- Environment used: Windows 11 + VSCode + GitHub.
From Zero to Ready to Contribute: Illustrated with Microsoft Edit.
Table of Contents
- 00. Progress Checklist
- 01. Exercises
- 02. Prerequisites
- 03. Creating a fork
- 04. Installing the Rust nightly toolchain
- 05. Read
README.md - 06. Compile for the first time on the
mainbranch (just to check) - 07. Create a branch and discover the project
- 08. Stay in sync with the original project
- 09. Project Structure
- 10. Points of attention
- 11. Study error handling
- 12. Debugging
- 13. Create a Pull Request
- 14. Webliography
00. Progress Checklist
- I forked the project
- I installed the nightly Rust toolchain
- I read
README.mdcarefully - I successfully compiled the project
- I ran the application in debug and release mode
- I ran the tests
- I created a branch
xyz_docs/discover - I know the “morning routine” to stay in sync with the original project
- I read
main.rs - I explored at least 3 other modules
- I understood the general structure
- I identified where error handling is located
- I found an example of
Result<> - I found an example of
unsafe - I installed
CodeLLDB, set a breakpoint and moved - I read an issue on GitHub
- I created a test branch
- I’m ready to contribute!
01. Exercises
Level 00: Reading
- Read
src/main.rsentirely - Understand the program flow (from
main()to the main loop) - Identify all functions called from
main()
Level 01: Exploration
- Choose a module file (ex:
fuzzy.rs) - Read all functions
- Document what each function does (with comments)
Level 02: Modification
- Add a debug message when opening a file
- Compile and test
- Submit a PR to fix a typo in a comment
Level 03: Contribution
- Look at the Issues with the
E-help-wantedlabel - Choose a simple issue (ex: improve documentation)
- Create a branch, make modifications, and submit a PR

02. Prerequisites
I suppose:
Now, from the Install Rust page, download rustup-init.exe (64b).
Then open a terminal (WIN+X then I)
rustup-init.exe # this installs rust
rustc --version # just to make sure everything is OK.

# Result:
#       rustc 1.90.0 (1159e78c4 2025-09-14)
Regarding setting up Rust on Windows, you can read dedicated post
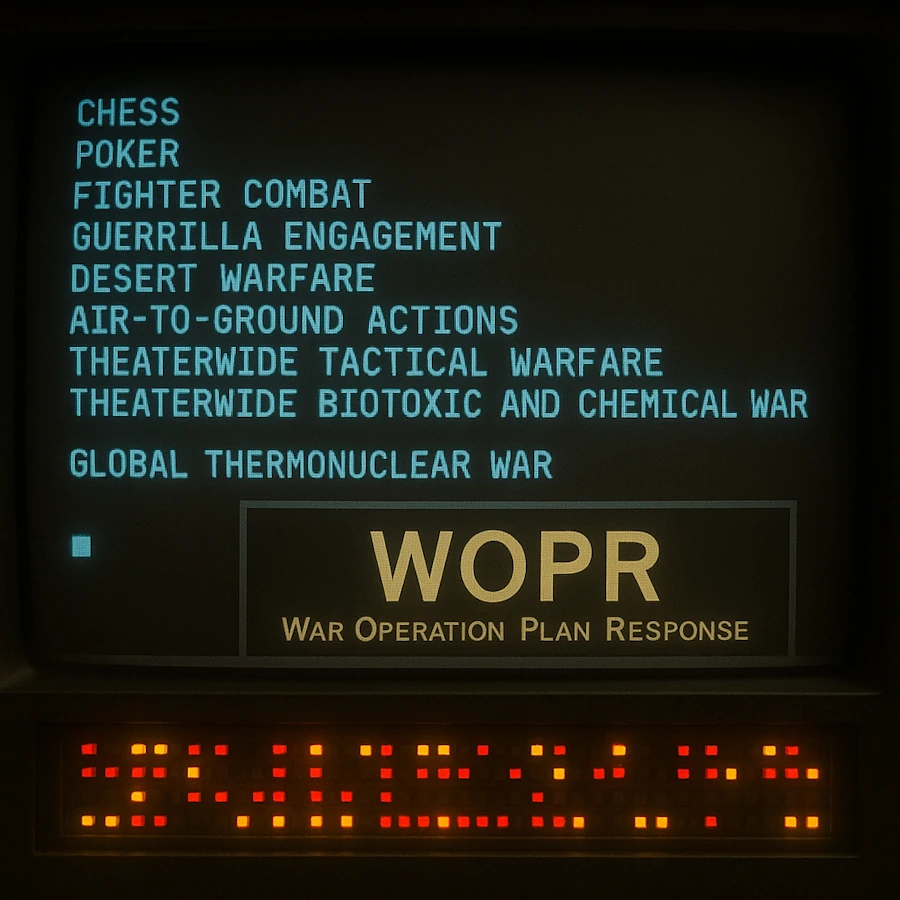
And if you dont know it yet, here how edit looks like:

03. Creating a fork
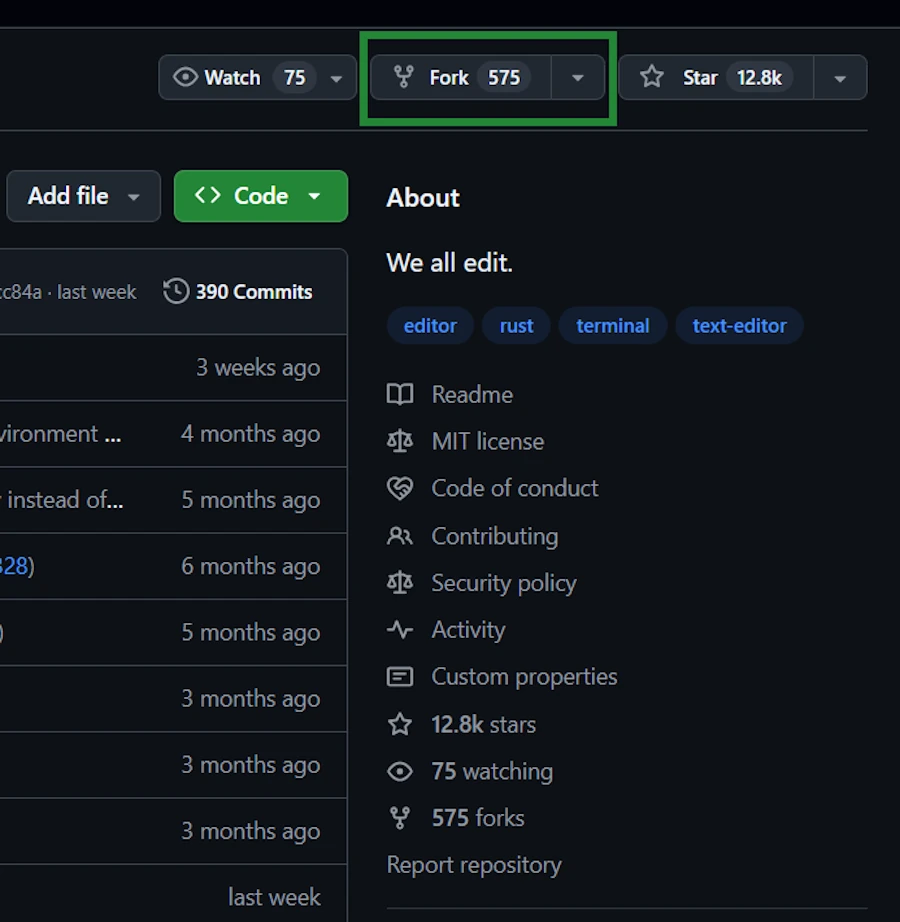
- On
https://github.com/microsoft/edit.git, click the “Fork” button at the top right - This creates a copy of the project on YOUR GitHub account.
- Clone YOUR fork on your local disk. Repeat after me…I clone MY forked version, not the original.
# The terminal should still be open
git clone https://github.com/YOUR_NAME/edit.git
At this point it might be a good idea to move to microsoft_edit/ directory, open code and open a terminal in VSCode.
cd microsoft_edit/
code .
# CTRL + ù to open an integrated terminal
The first time
git switch main # normally we are on the main branch
git remote -v # to check
git remote add upstream https://github.com/microsoft/edit.git
git remote -v # to check again
The before last command adds a new “remote” to our local Git repository:
git remote add: adds a new reference to the distant repoupstream: the name we’re giving to this remotehttps://github.com/microsoft/edit.git: the URL of the distant repo
This will help to keep our repo in sync with the original.

04. Installing the Rust nightly toolchain
We need it to compile Microsoft Edit. We can have both Rust toolchains (stable and nightly) installed side by side on the same PC.
rustup install nightly
Check what is installed
rustup toolchain list
# Result:
#       stable-x86_64-pc-windows-msvc (active, default)
#       nightly-x86_64-pc-windows-msvc
Move to the microsoft_edit/ directory then verify that rust-toolchain.toml exists and that it specifies “nightly”
Get-Content rust-toolchain.toml
# Result:
#       [toolchain]
#       channel = "nightly"
- When we will run
cargo buildin themicrosoft_edit/folder,Cargowill automatically use the “nightly” version of the compiler - When we run
cargo buildin one of our folders (one withoutrust-toolchain.toml),Cargowill use the “stable” version (our default Rust compiler version)
What is the active Rust version?
rustc --version
# In the `microsoft_edit/` folder:
#       rustc 1.93.0-nightly (c90bcb957 2025-11-06)

# In another folder:
#       rustc 1.90.0 (1159e78c4 2025-09-14)
Display which toolchain will be used
rustup show

# Result in `microsoft_edit/` with nightly override:
#       Default host: x86_64-pc-windows-msvc
#       rustup home:  C:\Users\phili\.rustup
#
#       installed toolchains
#       --------------------
#       stable-x86_64-pc-windows-msvc (default)
#       nightly-x86_64-pc-windows-msvc (active)
#
#       active toolchain
#       ----------------
#       name: nightly-x86_64-pc-windows-msvc
#       active because: overridden by 'C:\Users\phili\OneDrive\Documents\Programmation\rust\02_xt\004_edit\rust-toolchain.toml'
#       installed targets:
#         x86_64-pc-windows-msvc


# Result in one of our projects:
#       Default host: x86_64-pc-windows-msvc
#       rustup home:  C:\Users\phili\.rustup
#
#       installed toolchains
#       --------------------
#       stable-x86_64-pc-windows-msvc (active, default)
#       nightly-x86_64-pc-windows-msvc
#
#       active toolchain
#       ----------------
#       name: stable-x86_64-pc-windows-msvc
#       active because: it's the default toolchain
#       installed targets:
#         x86_64-pc-windows-msvc
How to get the up to date version?
Indeed, three days from now, before to “touch” Microsoft Edit, we need to get the latest version:
rustup update nightly
05. Read README.md
- No one can do it for you
- Then take 2 minutes to read
CONTRIBUTING.md
06. Compile for the first time on the main branch (just to check)
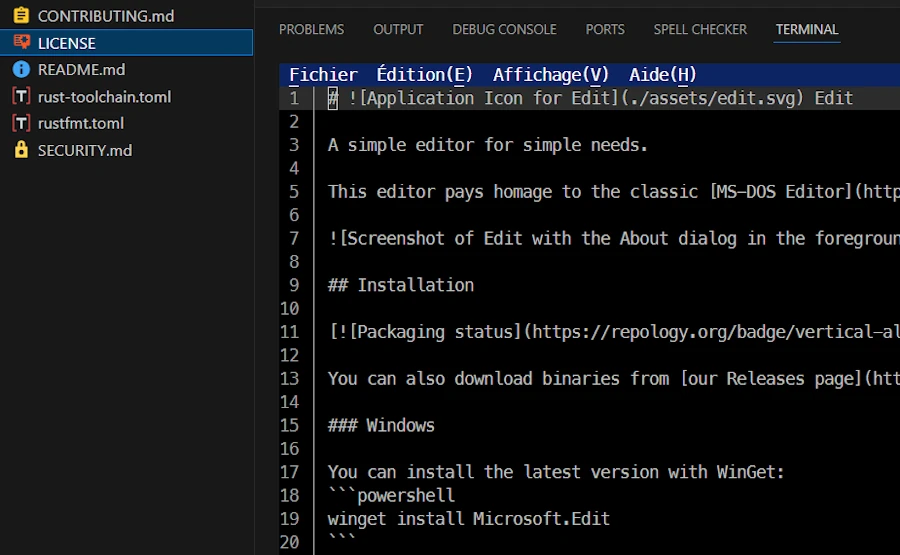
If you are not yet in VSCode, move to the microsoft_edit/ directory otherwise use the integrated terminal which is already open or open a new one.
Check the code without compiling
cargo check
Compile (development build) and run
cargo build
# Increase the height of the terminal in VSCode
cargo run

Launch the editor
./target/debug/edit
Launch with a file
cargo run -- README.md # README.md is at the root of the Edit project
cargo run -- do_not_exist.md

# or directly
./target/debug/edit README.md
./target/debug/edit do_not_exist.md
Run the tests
cargo test
Compile (optimized release build) and run
Since you read the README.md you know that you have to use this command:
cargo build --config .cargo/release-nightly.toml --release
Launch the editor
./target/release/edit
Launch it with a file
cargo run -- release -- README.md # README.md is at the root of the Edit project
cargo run -- release -- do_not_exist.md

# or directly
./target/release/edit README.md
./target/release/edit do_not_exist.md
07. Create a branch and discover the project
- We are in VSCode
- One terminal is open (the tests are done)
- We can either create the branch from the console or with the GUI
Side Note: Below, the 3 letters “bcr” is the trigram for my last name. Use your own.
git switch -c bcr_docs/discover # creates and switches to the `bcr_docs/discover` branch

# Then we can use git switch bcr_docs/discover
Normally we plan to behave like visitors, in read-only-ninja mode and we have no intention to make any modification.
If we break everything
No panic, git is our friend.
git switch main                 # return to a clean state
git branch -D bcr_docs/discover # delete the branch
git switch -c bcr_docs/discover # start over
I would like to rename the branch
git branch -m fix-menu-demo
If you want to make any modifications
Think twice BEFORE. I strongly recommend to create another branch.
git switch main
git switch -c other_branch_name

# Or
git switch -c other_branch_name main # pay attention to the `main` at the end
If at the end we don’t want to keep the branch
git switch main                 # return to clean state
git branch -D other_branch_name # delete the branch
08. Stay in sync with the original project
Tomorrow morning for example. Move to the microsoft_edit/ directory.
rustup update nightly   # do you remember why?

git fetch upstream      # fetch the updates
git switch main         # leave the branch where we are and go to main
git merge upstream/main # merge the updates
git push origin main    # push to our repo

git switch my_branch                         # return to our branch
git rebase main                              # integrate the latest changes into our branch
git push --force-with-lease origin my_branch # work then push to our repo
Most of the git command can be executed using the GUI. See below an example with git fetch upstream:
Side Note: Regarding --force-with-lease I’ll give much more detail with wonderful drawings (😡) later in this section.
09. Project Structure
Move to the microsoft_edit/ directory
code .
git switch bcr_docs/discover # return to our branch
Here is the simplified structure of the Rust project:
.
│   .gitignore
│   Cargo.toml
│   README.md
├───.cargo
│       release-nightly.toml
├───benches
│       lib.rs
├───i18n
│       edit.toml
├───src
│   │   framebuffer.rs
│   │   fuzzy.rs
│   │   lib.rs
│   ├───bin
│   │   └───edit
│   │           main.rs
│   ├───simd
│   │       lines_bwd.rs
│   │       lines_fwd.rs
│   │       memchr2.rs
│   │       memset.rs
│   ├───sys
│   │       unix.rs
│   │       windows.rs
│   └───unicode
│           utf8.rs
│
└───tools
Build your own tree and add your comments
cargo clean
tree /F
Explore main.rs
This is the entry point of the application. Look at:
- The
fn main()function - How arguments are parsed
- How the editor is initialized
Identify key modules
arena, buffer, simd, sys, unicode…
10. Points of attention
Modular architecture
How the project is organized into modules?
Checkout the mod and use in the code
// In src/bin/edit/main.rs
mod draw_editor;
mod state;


// In src/lib.rs
mod fuzzy;     // Import fuzzy.rs
mod sys;        // Import the sys/ folder
unsafe code
The project uses a lot of unsafe to interact with system APIs (C). This is a good example of FFI (Foreign Function Interface) in Rust.
CTRL+SHIFT+F then search for unsafe
Files to look at:
src/sys/unix.rssrc/sys/windows.rs
Terminal management
How do they manipulate the terminal? Look for color for example.
Algorithms
Fuzzy search and other algorithms
File to look at:
src/fuzzy.rs
11. Study error handling
This is an example of topic to study.
1. Search in the code
With VSCode, select src/ then SHIFT+ALT+F
Result<unwrapexpectenum.*ErrorActivate regular expression (ALT+R)struct.*ErrorActivate regular expression (ALT+R)
In VSCode, F12 (Go to Definition), SHIFT+F12 (Go to Reference) and CTRL+F12 (Go to Implementation) are our best friends here.
2. Interesting files for errors
src/sys/unix.rsandsrc/sys/windows.rs: System errors (I/O, terminal)- Look for
Result<T, E>in function signatures - See how they use
.unwrap(),.expect(), or the?operator
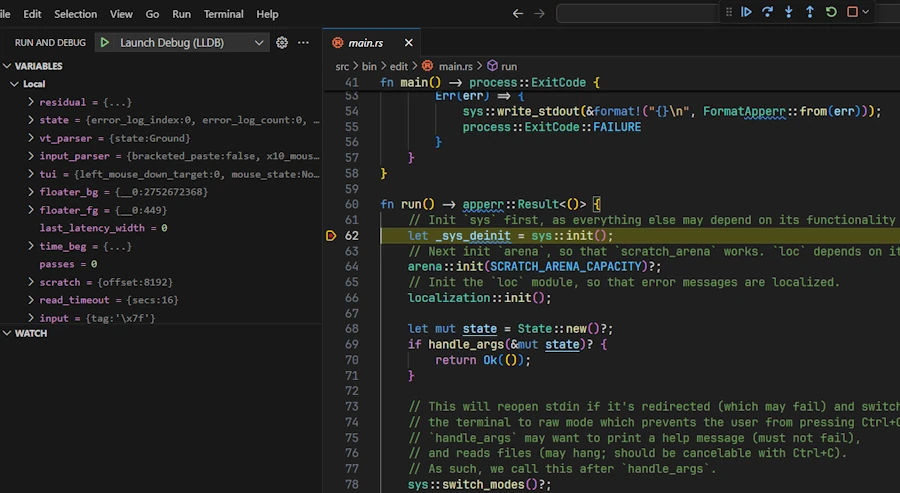
12. Debugging
- Install
CodeLLDBextension - Set a breakpoint (
F9) insrc/bin/edit/main.rsfor example - Start Debugging (
F5) - Move forward line by line (
F10) - Inspect variables values on the left hand side
Enable logs with env_logger
$env:RUST_LOG='debug'; cargo run; Remove-Item env:RUST_LOG
Does it work? Do you know why?
13. Create a Pull Request
No, the plan is NOT to spam the team but to study a scenario.
It is Sunday morning. It is raining… Ok, let’s open a terminal in VSCode.
Below I call:
| Term | Description |
|---|---|
| upstream | Original project on GitHub (source) |
| origin | The fork in my personal GitHub repo |
| local | The local repository on the PC |
| A, B, C… | Commits in Git history |
| main | Main branch |
| xyz_docs/typos | The branch for documentation |
| main@local | main branch in local repository (my hard disk) |
| main@origin | main branch in the fork (my GitHub repo) |
| main@upstream | main branch in the original project (their GitHub repo) |
| xyz_docs/typos@local | Feature branch in local repository |
| xyz_docs/typos@origin | Feature branch in the fork (origin) |
1. Starting point
A --- B --- C
            │
          main@local
          main@origin
Before to work on a branch let’s make sure local and origin are in sync with upstream.
git fetch upstream # fetch the updates from upstream where main@upstream = A B C D E
                   # Does NOT change the current branch
                   # Saves the new items locally in remote branches such as upstream/main
git switch main    # main@local = A B C
The 2 lines above could be replaced with:
git pull upstream main
Now we merge the commits and we update origin.
git merge upstream/main # main@local = A B C D E
git push origin main    # main@origin = A B C D E
The situation becomes:
A --- B --- C --- D --- E
                        │
                      main@local
                      main@origin
                      main@upstream
2. Working on the branch
git switch -c xyz_docs/typos # create & switch to the branch. xyz_docs/typos@local = A B C D E
When the job is done on the branch we may have multiple commits on it. The situation looks like this:
                      main@origin
                      main@local
                        │
A --- B --- C --- D --- E
                         \
                          X --- Y
                                │
                          xyz_docs/typos@local
Now we push the branch to origin.
git status
git add .
git commit -m "docs: Fix typos in documentation"  # xyz_docs/typos@local = A B C D E X Y
git push origin xyz_docs/typos                    # push the branch to the repo. xyz_docs/typos@origin = A B C D E X Y
Here is the situation. There is a branch xyz_docs/typos@local and a branch xyz_docs/typos@origin.
                      main@origin
                      main@local
                        │
A --- B --- C --- D --- E
                         \
                          X --- Y
                                │
                          xyz_docs/typos@local
                          xyz_docs/typos@origin
3. Pull Request
main@upstream has evolved, commits have been pulled and it looks like A - B - C - D - E - F - G - H
Before merging main@upstream into the branch, it is strongly recommended to:
- switch to
main@local - update it
- rebase the feature branch onto this new
main@local
git fetch upstream
git switch main
git merge upstream/main
The branches are now dispatched this way:
                                      main@local
                    main@origin       main@upstream
                        │                 │
A --- B --- C --- D --- E --- F --- G --- H
                         \
                          X --- Y
                                │
                          xyz_docs/typos@local
                          xyz_docs/typos@origin
We can switch to xyz_docs/typos and rebase it:
git switch xyz_docs/typos
git rebase main
The branch xyz_docs/typos@local is moved to the end of the history. The history has been re-written but it is linear and easier to understand. The xyz_docs/typos@origin did’nt move yet. Note X' and Y' notation because they are copies of X and Y but not X and Y themselves.
                                      main@local
                    main@origin       main@upstream
                        │                 │
A --- B --- C --- D --- E --- F --- G --- H
                         \                 \
                          X --- Y           X' --- Y'
                                │                 │
                  xyz_docs/typos@origin   xyz_docs/typos@local
It is time to synchronize xyz_docs/typos@local and xyz_docs/typos@origin because locally we have A-B-C-D-E-F-G-H-X'-Y' while we have A-B-C-D-E-X-Y on origin. To do the sync we use --force-with-lease because before forcing the push, Git will check that the remote branch is exactly in the state we last retrieved. If someone else (me from another PC) has pushed commits in the meantime, the command will fail and warn us. This is a security. You can read this post.
git push --force-with-lease origin xyz_docs/typos
Finally we have:
                                      main@local
                    main@origin       main@upstream
                        │                 │
A --- B --- C --- D --- E --- F --- G --- H
                                           \
                                           X --- Y
                                                 │
                                   xyz_docs/typos@local
                                   xyz_docs/typos@origin
Tadaa! It is time to go to the GitHub web page of our repo and to open a pull request. Press the green button. We review carefully what will be sent then we press OK. When this is done, the PR is then a proposal to merge branch xyz_docs/typos@origin of the fork into the main branch of the original project main@upstream.
4. The days after

Task 1: While waiting our PR to be accepted/rejected, every morning we should continue to synchronize and update main@local and main@origin which may becomes late otherwise. Indeed main@uptream continue to evolve.
git fetch upstream              # fetch the updates from upstream where main@upstream = A B C D E F G H I J K
git switch main                 # main@local = A B C D E

git merge upstream/main         # main@local = A B C D E F G H I J K
git push origin main            # main@origin = A B C D E F G H I J K
Here is the situation:
                                                        main@local
                                                        main@origin
                                                        main@upstream
                                                            │
A --- B --- C --- D --- E --- F --- G --- H --- I --- J --- K
                                           \
                                           X --- Y
                                                 │
                                   xyz_docs/typos@local
                                   xyz_docs/typos@origin
And yes, we leave the branch where it is connected because what matters for the reviewers is the diff between H and Y. If we move forward the branch and connect X to K this is a very bad idea.
Side Note: Yup, confirmed — I hate ASCII art. 😡
Task 2: If reviewers request more modifications before acceptance… We go back to xyz_docs/typos@local, do what need to be done then commit and push onto xyz_docs/typos@origin. Our new commits are added to your branch. The PR automatically updates with the new commits. Reviewers see the changes directly in the PR. No manual action required on GitHub—everything is synchronized.
git switch xyz_docs/typos
git status
git add .
git commit -m "docs: Address reviewers comments"
git push origin xyz_docs/typos
If the PR is accepted, Y will be merged with H.
5. This is the end

If the PR is accepted, we are all good we can delete the branch and get in sync with origine. Otherwise, if the PR is definitively rejected we may decide to keep the branch because it contains some code we would like to reuse, blah blah blah.
To delete the branch xyz_docs/typos you can do:
git switch main
git branch -D xyz_docs/typos            # delete the branch locally
git push origin --delete xyz_docs/typos # delete the branch on origin
git fetch --prune origin                # clean no longer used references
git branch                              # check
git branch -r                           # check on origin
Once deleted, you can reuse the name xyz_docs/typos to create a new branch tomorrow morning if you want to correct typos.
6. Summary
# sync main@local & main@origin with upstream
git fetch upstream
git switch main
git merge upstream/main
git push origin main

# work on and push the branch
git switch -c xyz_docs/typos
git status
git add .
git commit -m "docs: Fix typos in documentation"
git push origin xyz_docs/typos

# PR
git fetch upstream
git switch main
git merge upstream/main
git switch xyz_docs/typos
git rebase main
git push --force-with-lease origin xyz_docs/typos
# open a PR via GitHub

# add modifications to the PR
git switch xyz_docs/typos
git status
git add .
git commit -m "docs: Address reviewers comments"
git push origin xyz_docs/typos

# sync main@local & main@origin with upstream
git fetch upstream
git switch main
git merge upstream/main
git push origin main

# delete the branch
git switch main
git branch -D xyz_docs/typos
git push origin --delete xyz_docs/typos
git fetch --prune origin
git branch
git branch -r
7. This script may help
Name it sync-fork.ps1, use this command and read (again, I can’t do it for you)
Get-Help ./sync-fork.ps1 -Full
<#
.SYNOPSIS
    Fork Synchronization Script - Keeps your fork and branches in sync with upstream

.DESCRIPTION
    1. Drop this script at the root of the project and add it to `.gitignore`
    2. Edit the variable `$upstreamUrl` in the code

    The idea behind this script is to have a Swiss Army knife usable in the following 4 scenarios:

    1. I've created a fork. I just want to synchronize `main@local` and `main@origin` with `main@upstream`. I invoke the script without a branch name parameter. Example: ./sync-fork.ps1

    2. I want to test some things and start a new branch. I invoke the script with a branch name parameter. `main@local` and `main@origin` are first synchronized with `main@upstream`. The branch is then created. At the end, I've switched to the branch and can start working. Example: ./sync-fork.ps1 -BranchName feature/new_feature

    3. I've started working on the branch and probably made commits on `my_branch@origin`. I want to stay in sync with `upstream`. I invoke the script with my branch name parameter. `main@local` and `main@origin` are first synchronized with `main@upstream`. Then my branch is rebased on top of `main@local`. At the end of the script, I've switched to the branch and can continue working. Example: ./sync-fork.ps1 -BranchName feature/new_feature

    4. I think my branch is ready. I've made commits on `my_branch@origin`. I want to create a PR. I invoke the script with my branch name parameter. `main@local` and `main@origin` are first synchronized with `main@upstream`. Then my branch is rebased on top of `main@local`. At the end of the script, I've switched to the branch and can confidently proceed to create my PR on GitHub (or in VSCode). Example: ./sync-fork.ps1 -BranchName feature/new_feature

    This script automates synchronizing a Git fork with the upstream repository.
    It performs the following operations:
    - Adds upstream remote if missing
    - Fetches latest changes from upstream
    - Updates local main branch
    - Optionally creates or updates a working branch and rebases it on local main


.PARAMETER BranchName
    (Optional) The name of the working branch to update or create.
    If omitted, only the main branch and origin are synchronized.

.PARAMETER DryRun
    When specified, no Git commands are executed — they are only displayed.

.EXAMPLE
    Get-Help ./sync-fork.ps1 -Full
    Displays complete help for this script.

.EXAMPLE
    ./sync-fork.ps1
    Synchronizes only main@local and main@origin with main@upstream.

.EXAMPLE
    ./sync-fork.ps1 -BranchName feature/new_feature
    Synchronizes main@local and main@origin with main@upstream.
    Then updates or creates the feature/new_feature branch with the latest upstream changes.

.EXAMPLE
    ./sync-fork.ps1 -BranchName fix/typos -DryRun
    Simulates all operations without executing any Git commands.

.NOTES
    Author: 40tude
    Version: 1.5
    Required: PowerShell 5.1+
#>

param(
    [Parameter(Position = 0)]
    [string]$BranchName,

    [switch]$DryRun
)

# --- CONFIGURATION ---
$upstreamUrl = "https://github.com/<NAME>/<PROJECT>.git"  # Change this URL to your upstream repo

# --- HELPER FUNCTION ---
function Run-Git {
    param([string]$Command, [string]$Step)

    if ($DryRun) {
        Write-Host "[DryRun] git $Command" -ForegroundColor DarkGray
    } else {
        Write-Host "$Step..." -ForegroundColor Cyan
        Invoke-Expression "git $Command"
        if ($LASTEXITCODE -ne 0) {
            Write-Host "Error during step: $Step" -ForegroundColor Red
            exit 1
        }
    }
}

# --- STEP 1: Ensure origin and upstream remotes exist ---
$remotes = git remote
if ($remotes -notcontains "origin") {
    Write-Host "Error: 'origin' remote is missing. Please check your repository setup." -ForegroundColor Red
    exit 1
}

if ($remotes -notcontains "upstream") {
    Write-Host "Adding upstream remote..." -ForegroundColor Yellow
    Run-Git "remote add upstream $upstreamUrl" "Add upstream remote"
} else {
    Write-Host "Upstream remote already exists." -ForegroundColor Green
}

# --- STEP 2: Sync local main and origin with upstream ---
Run-Git "fetch upstream" "Fetching from upstream"
Run-Git "switch main" "Switching to main branch"
Run-Git "merge upstream/main" "Merging upstream/main into local main"
Run-Git "push origin main" "Pushing updated main to origin"

# --- CONDITIONAL: only continue if a branch name was provided ---
if (-not [string]::IsNullOrEmpty($BranchName)) {
    Write-Host "`nProcessing branch '$BranchName'..." -ForegroundColor Cyan

    $branchExists = git branch --list $BranchName

    if (-not $branchExists) {
        Run-Git "switch -c $BranchName" "Creating new branch '$BranchName'"
    } else {
        Run-Git "switch $BranchName" "Switching to existing branch '$BranchName'"
    }

    Run-Git "rebase main" "Rebasing '$BranchName' on main"
    Run-Git "push --force-with-lease origin $BranchName" "Pushing '$BranchName' to origin"

    Write-Host "`nBranch '$BranchName' is now up to date and ready for a Pull Request." -ForegroundColor Green
}
else {
    Write-Host "`nNo branch name provided. Only main and origin were synchronized with upstream." -ForegroundColor Green
}
14. Webliography
- edit GitHub page
- Project Issues
- Discussions
- Conventional Commits
- Commit Messages
- Commit Messages
- Cargo Book
- You’re welcome to share comments or suggestions on GitHub to help improve this article.